Showing posts with label paint. Show all posts

Thursday, October 6, 2011

Fall outdoor decor

I'm joining up the fall parteh at Sarah's today with my BOO pumpkins. I saw this idea on pinterest and I decided to switch it up a bit.
1003boo4

First, I spray painted the pumpkins with Oil Rubbed Bronze. Then, since my oldest was helping me with this craft I made it a little easier for him by scribbling the letters on paper first.
1003boo

This made it easier for him to "trace" with the silver thumbtacks:
1003boo1

Once the letter was done, I held the thumbtacks in place and gently pulled off the paper.
1003boo2

My stylist-in-training decided that my Martha Stewart web ribbon would be perfect on the urn I painted a few months ago:
1003boo5

Pretty simple and easy, and I love how the thumbtacks reflect light so even if it's getting dark you can see the pumpkins with their BOO :D

Hope you enjoyed this outdoor craft!


Designer GardenThe Shabby Nest Weekend Bloggy ReadingChic on a Shoestring DecoratingmonogramWeekend Bloggy ReadingTip Junkie handmade projects

Monday, September 12, 2011

Lookit what mei hubby built me!

This spray paint storage rack now hangs in the shed he built a few weeks ago:
0909paints
Of course, the first thing he said after showing it to me was "just because it's half empty, doesn't mean we need to fill it up." Awww, he's so cute - now I just need to get the other half of my stash and put it up there ;D

Thursday, September 8, 2011

Frame Jewelry Display

You know how sometimes the glass that comes with a photo frame breaks? And you don't want to throw that frame away so you stash it for months in various places, until your husband is all "hmmm, are you going to do something with this thing?" And then a friend gifts you their old coffee table but one of the ten knobs is missing and you're all "Whoa! Frame + knobs? Can I say jewelry display?"

Okay, so maybe you haven't thought this, but I did, and here are the results.
0903display1

I took the frame and painted it in Oil Rubbed Bronze, then covered the backing with gold dust vellum paper from my favorite paper store.

The backing was a piece of laminate that my husband had leftover from a project and he cut it to size for me. Once the laminate and vellum were adhered, I marked a grid of nine spots on the back - three across, three up and down. My awesome husband drilled the laminate and paper and we bought some new screws because the ones that came with the knobs were too long.

I now have a place to display some of my bracelets and necklaces:
0903display4

0903display3

0903display2

The total cost of this project was solidly under ten dollars. The paper was $2.75 (plus tax) and the new screws/washers were under $5. I had the frame, we had the piece of laminate and we had the nine knobs from my craft table project.

I hope you have enjoyed my repurposed photo frame craft!

Transformation ThursdayPhotobucket
HookingupwithHoHWeekend Bloggy ReadingThe Shabby NestmonogramPhotobucket

">
UndertheTableandDreamingTip Junkie handmade projects

Monday, August 15, 2011

My house colors

We're in the middle of a little living room project:

0813livingroom

and I had to look up my living room wall color. I did a post about my house paint colors in my last blog so I thought it better to list them here for future reference.


Our master bedroom has a sponge-finish treatment on the wall combining the 2 shades of tan. The wall where the lovely mirrored closet doors got the dark burgundy but lord knows I regret that decision. My plan is to do away with the closet doors completely and paint the wall to match the rest of the bedroom.


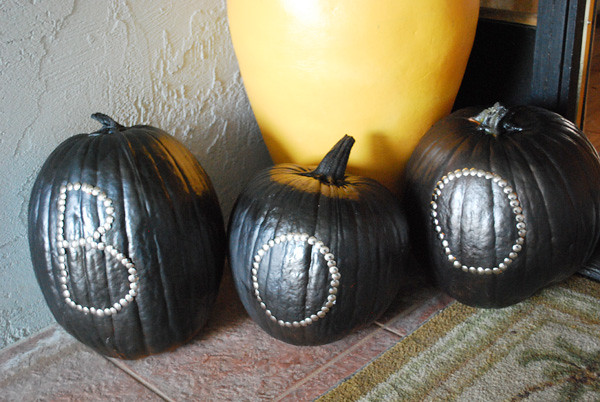
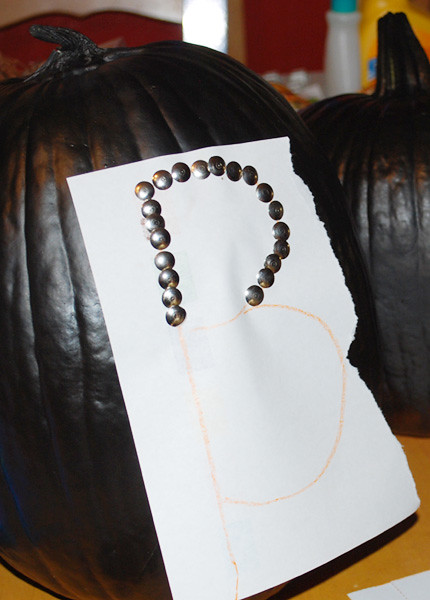
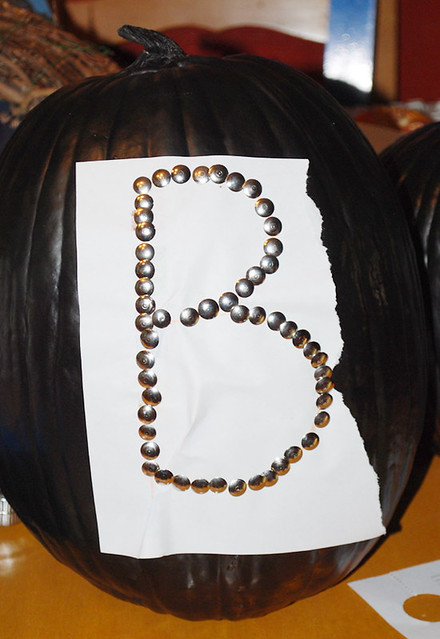
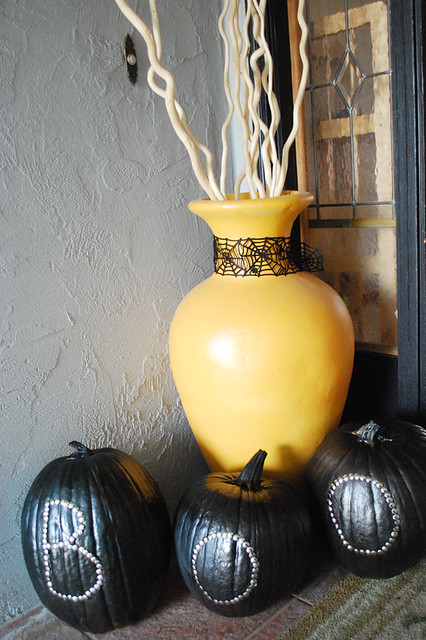
Our living room has a similar warm palette but instead of the burgundy we've added a dark chocolate brown accent color in the form of our new IKEA TV console and the project we are currently working on, which will be painted to match the console.


My little man's room has two shades of light blue, and we seriously need to upgrade his bedroom soon. Aside from a few Mickey-themed items, there's nothing else there and he outgrew Mickey a couple of years ago.


My kitchen/dining room colors are super warm and cozy, I talked about the changes we made 8 years ago in this post.

My bathroom got a cheerful coat of bright, warm yellow paint, which I continue to love, and it's going to get remodeled in the next couple of months (fingers crossed) - I'm debating tile choices.

The paint color is Ralph Lauren's Chamois. The cabinets were painted dark brown, echoing the living room console.

I will be updating the progress on our living room project in a few days!